There are ten step to installation of a water feature
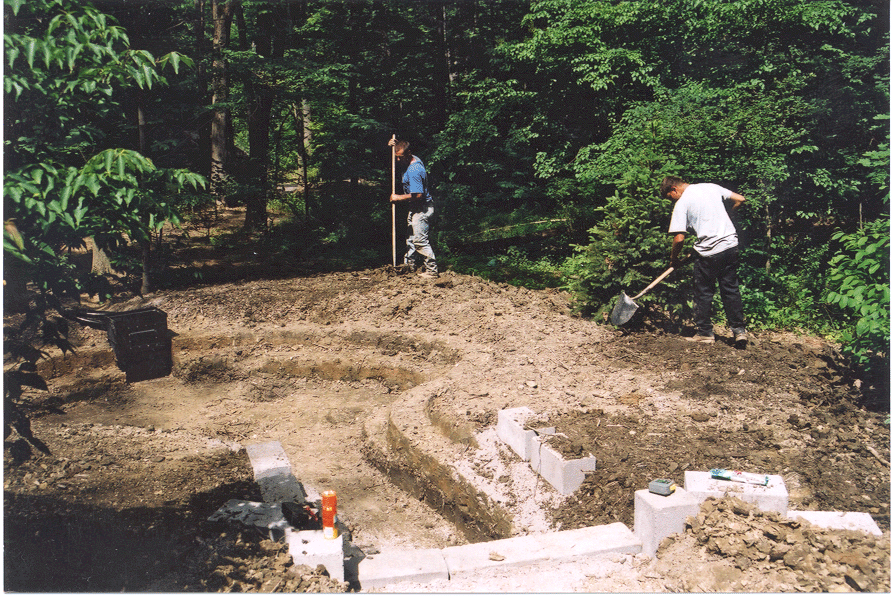
- Bulk soil excavation
- Shaping of final Feature
- Installation of filter and pump housings
- Installation of water falls and feature for under the liner
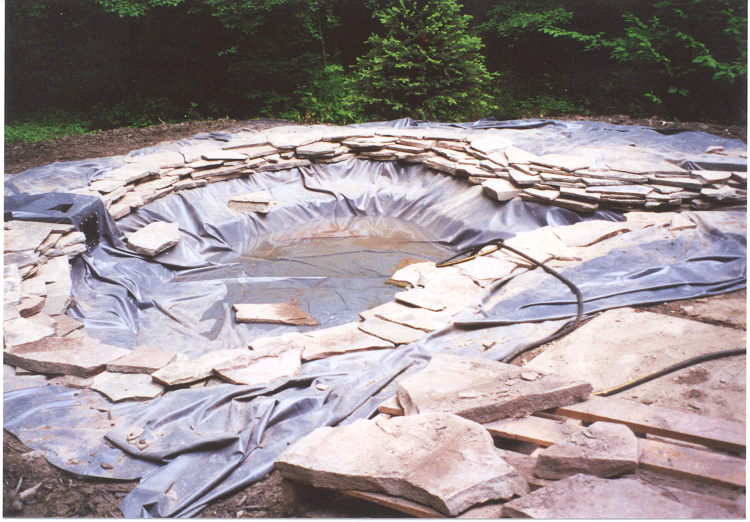
- Installation of the liner and adhering them together
- Installation of stone and other materials
- Trimming the liner and folding over
- Installing the pump and filters and pipes
- Fine tuning of the water flow
- Installation of the plant inside and outside of the feature
How to Maintain a Water Feature
Step One:
Bulk Excavation
The Bulk Excavation of soil can be done by hand
or with a machine depending on the site and size of the water feature.
Start by outlining the water feature with paint or a garden hose. Then
start the excavation at the edges and work your way toward the center.
Excavate the entire first layer all the way across the feature and start
at the lowest end. After the first layer is compete than decide on the
width of the ledge I suggest at least 12 inches. Excavate in the same
way until completed with the bas of the feature. While digging use a transit
or level to make sure that you are with in a couple of inches of level,
do not worry about level now it will slow the excavation. When you reach
the bottom of the feature make sure that you leave deep pocket for maintenance
purpose discussed in Maintenance of a Water Feature.
Step Two:
Shaping of the Final Feature
This step will include patients, a transit/level,
and time. Start at the top edge of the feature and level all the way around
until you have a good levelness over the entire feature. Level this layer
by cutting the filling were needed. If the first layer is done correctly
than the rest should be easy, all you have to do is measure down and check
with the transit periodically to make sure you are on the right track.
This step ensures the proper shape f the feature and that the levels are
correct for the plants and stones. After this step you will not be able
to reshape the pond. Make sure that there are no rocks, sticks, roots
or anything also in the features but soil, otherwise the liner may get
snagged of poked in the next steps. All areas of the feature should be
smooth for you to move to the next step.
Step Three:
Installation of Filter and Pump Housing
This step can be done as a part of step two as well
because you need to now the level of the water and the filter box. These
boxes should be level and secure in place before step four
Step Four:
Installation of water falls and feature for under the liner
If you have a water fall or a feature with different
levels this is the time to construct them under the liner. This will ensure
a good base for water falls and level and you will not have a slumping
headwall. These are usually constructed out of smooth solid concrete blocks
and have a good base like a patio. This is also the time to add supports
for bridges and walkways. The step will save time and aggravation later
when you place construction material in the feature.
Step five: Installation
of the Liner
This is a critical step in the construction of the
water feature. There are two different methods used in the base of the
liner.
The first is to place sand in the bottom and on all surfaces of the feature.
Then you should smooth and tamp the sand for the feature. Then you would
lay the liner in the feature.
The second is to use a felt liner over the entire feature surface. This
is the method that I suggest using. You need to lay extra thickness' of
the liner over the sharp edges of the water falls or the levels in the
feature. Now it is time to install the liner. This may take many people
depending on the feature. First you will need to unfold the liner completely
and than pull the liner across the feature being careful not to snag the
liner on anything sharp. Make sure the the liner is centered in the feature
and that the excess is equal on both sides. (Note: for the next activities
make sure boots are clean and clear of rock in the soles.)
Go into the bottom of the feature and start to form the liner to the features
wall and ledges. Start this at the bottom and move your way to the top.
You will need to make folds in the liner. If the pond is large and you
have different sections of liner than glue them together with the recommended
solvents and cleaners. Make sure the the liners are both clean and dry
and try to be on a level surface. If you can prefabricate the liners than
do so it will be easier. This step is vital in a multilevel pond so be
patient and careful. Once the liner is in than you can start on the next
step. Do not cut the liner at this time you may need more when the material
and water are in the feature. This is the time to adhere the liner to
the filter box and pump housing this will be in the instruction to the
pond. I suggest bolting and gluing the liner to the boxes.
For
step six through ten click here.
For
photo for installation click here

